Agent Auto Provision
Supported CRMs | Salesforce |
Supported PBX systems | All |
The Agent Auto-Provision feature creates a new Tenfold user whenever a new user is created in Salesforce. Similarly, whenever a Salesforce user is deactivated, the corresponding Tenfold user is deleted. Creation and deletion occurs automatically without the need to sync users. Any custom user fields for the new Tenfold users automatically sync as well.
How it works
Tenfold Agent Auto Provision creates a Salesforce workflow which checks Salesforce user objects for changes and creates events whenever changes (user additions, deactivations, or updates) occur. Using the HTTP POST method, the fields affected by the changes are sent in an outbound message using this webhook: <host>/v2/features/agent-auto-provision/organizations/:organization/integrations/provider/webhook.
Tenfold receives the changes as a message, and handles the changes reported from Salesforce using the following flow:
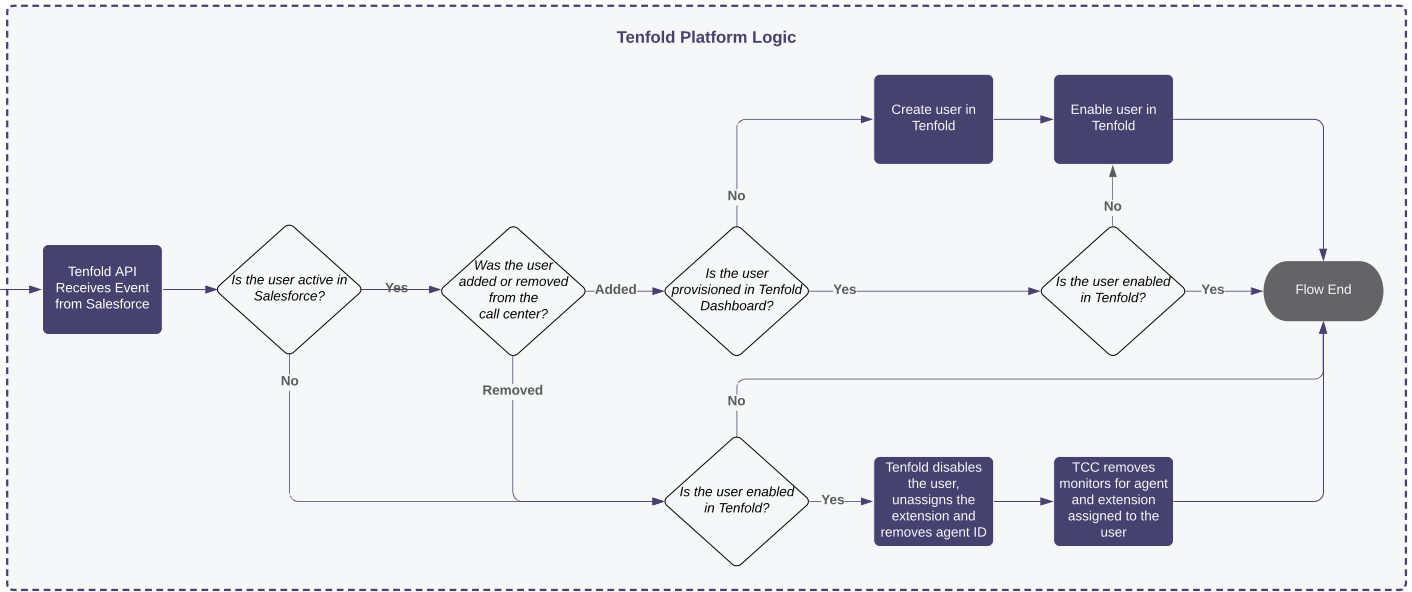 |
When multiple change notifications are received for the same user in one event message , the most recent change is honored.
If a user is logged in to Tenfold when the related Salesforce user object is deactivated, the Tenfold session ends.
The following table shows how Salesforce User object fields map to Tenfold user fields.
Salesforce User object field | Tenfold user field |
|---|---|
|
|
|
|
|
|
|
|
|
|
|
|
|
|
|
|
|
|
|
|
|
|
|
|
|
|
|
|
Before you start
Before enabling the Agent Auto Provision feature, you must:
Have a call center enabled in your Salesforce instance.
Ensure the integration user has the correct system and object permissions.
Enable the feature in Tenfold
To enable Agent Auto-Provision:
Go to Tenfold Dashboard in your browser and navigate to Users.
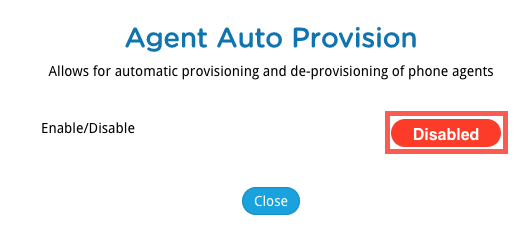
Click Agent Auto Provision.

NOTE: You can also enable and disable the Agent Auto Provision through Features.
Click Disabled so it changes to Enabled.
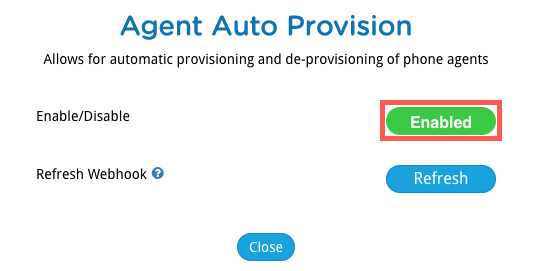
Agent Auto Provision is now configured and ready to use.
Test auto-provisioning
To test that auto-provisioning is working:
Create a new user in Salesforce.
Set the user to active and add the user to a call center.
Go to Tenfold Dashboard and navigate to Users. There is a Tenfold user with the same name as the Salesforce user.
Edit the user in Salesforce by changing a value that is visible in both Tenfold and Salesforce (example: the user's first name).
Go to the Tenfold Dashboard and navigate to Users.
The value has also changed for the Tenfold user.
In Salesforce, deactivate the user.
Go to Tenfold Dashboard and navigate to Users.
The user is no longer listed.
Manage Salesforce agents using Agent Auto Provision
Add, edit or deactivate a Salesforce user.
Ensure the user is active and added to a call center.
The user changes are synchronized with the users in Tenfold.
Note
If you add an existing Salesforce user to a call center, the user will appear in Tenfold. Similarly, removing a Salesforce user from a call center also removes the user from Tenfold.
Troubleshooting
Issue: User changes do not propagate from Salesforce to Tenfold
Possible solution
Go to Tenfold Dashboard in your browser and navigate to Users.
Click Navigate to Company settings > CRM.
Click Refresh next to Refresh Webhook.
Modify a user in Salesforce and check to see if the change is reflected in the corresponding Tenfold user.
Integration user permissions
Ensure the integration user has the necessary Salesforce system and object permissions so it can make necessary changes and successfully perform required functions. Refer to the Permissions section of the Salesforce Integration documentation for specific details.