Configure workflows using Manage Workflows
Supported CRMs | Bullhorn, Microsoft Dynamics, Oracle NetSuite, Salesforce, ServiceNow, SugarCRM, Tier1 CRM, Zendesk NOTE: Certain Advanced Workflow features are specific to certain CRMs where indicated. |
Supported PBX systems | All phone systems supported by Tenfold. Features may vary by system. For example, some phone systems support attached data while others do not. |
Create a workflow
Note
This topic is intended for users who have created a simple weblink workflow and are ready to learn the basics of coding a workflow by hand. More advanced users should refer to Advanced Workflow reference for an in-depth explanation of workflow features.
The Manage Workflows option under Advanced Workflow lets you configure a variety of automations using a JSON-based configurator.
NOTE: For an introduction to Tenfold workflows using Launcher, see Use Launcher to create weblinks. For detailed information on all of the capabilities of Tenfold Advanced Workflow, see Advanced Workflow reference.
To create a workflow:
In Tenfold Dashboard, click Features at the top of the page and then click Advanced Workflow in the left-hand navigation links.

If Advanced Workflow is disabled, click the pill button at the top of the screen so it turns green and displays "Enabled."

Click Manage Workflows.
Click Create New Workflow.
At the top of the form which displays, click the "Link 1" default text and type a descriptive name for the workflow.
The text displays in the UI to identify the webLink.
From the Teams list, select All Teams or the specific teams that will have access to the workflow.

From the Role list, select the roles that will have access to the workflow.

Under Add Description, enter some text describing the purpose of this link (optional).
In the right panel, some code displays. Replace the default code with your own workflow information.
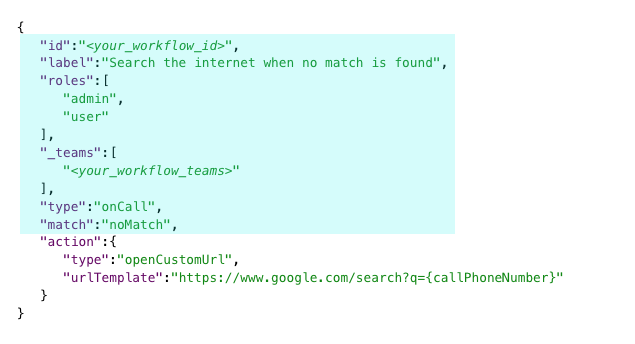
Example 1. A simple workflowThis workflow searches the CRM for the phone number when an incoming call does not match any contacts.
{
   "id":"<your_workflow_id>",
   "label":"Search the internet when no match is found",
   "roles":[
      "<your_selected_roles>"
   ],
   "_teams":[
      "<your_workflow_teams>"
   ],
   "type":"onCall",
   "match":"noMatch",
   "action":{
      "type":"openCustomUrl",
      "urlTemplate":"https://www.google.com/search?q={callPhoneNumber}"
   }
}
There are two main parts to any workflow. The trigger (shown in blue below) is activated when there is a call (type is "onCall") when there is no matching phone number in the CRM.
And the action, which is the event the trigger causes the happen, is shown below in red:
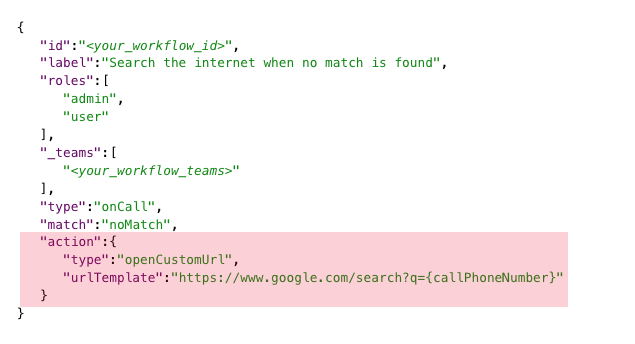
The trigger and the action each have a
typeproperty. The type defines the kind of trigger and the kind of action.For more information on triggers, actions, and supporting components, see Advanced Workflow reference.
You can configure workflows in many different ways using a variety of triggers, actions, and variables.
Click Save to apply your changes. Be sure to refresh your UI if you are logged in to your CRM while editing the link.
The openCustomUrl workflow in action
In the UI, whenever anyone calls the Tenfold user from a number that is not in the CRM, a browser tab opens in the user's browser and a search launches for the incoming call phone number:

The user does not need to click any links. If the user is a member of a team that has access to this workflow, and has a role allowed to use it, then the workflow simply launches whenever the trigger condition is met.
Supported variables
The following variables can be used in workflows using trigger types other than webLink.