Example workflow: Search the CRM for a matching record for multi-match call events
Use onCall and openCrmSearch
Supported CRMs | Bullhorn, Microsoft Dynamics, Oracle NetSuite, Salesforce, ServiceNow, SugarCRM, Tier1 CRM, Zendesk NOTE: Certain Advanced Workflow features are specific to certain CRMs where indicated. |
Supported PBX systems | All phone systems supported by Tenfold. Features may vary by system. For example, some phone systems support attached data while others do not. |
Search the CRM for a matching record during a multi-match call event
As a Tenfold administrator, you can configure the Tenfold UI to search for the matching CRM records for multi-match call events. Complete the following steps:
Navigate to your Tenfold Dashboard.
Click the Features tab.
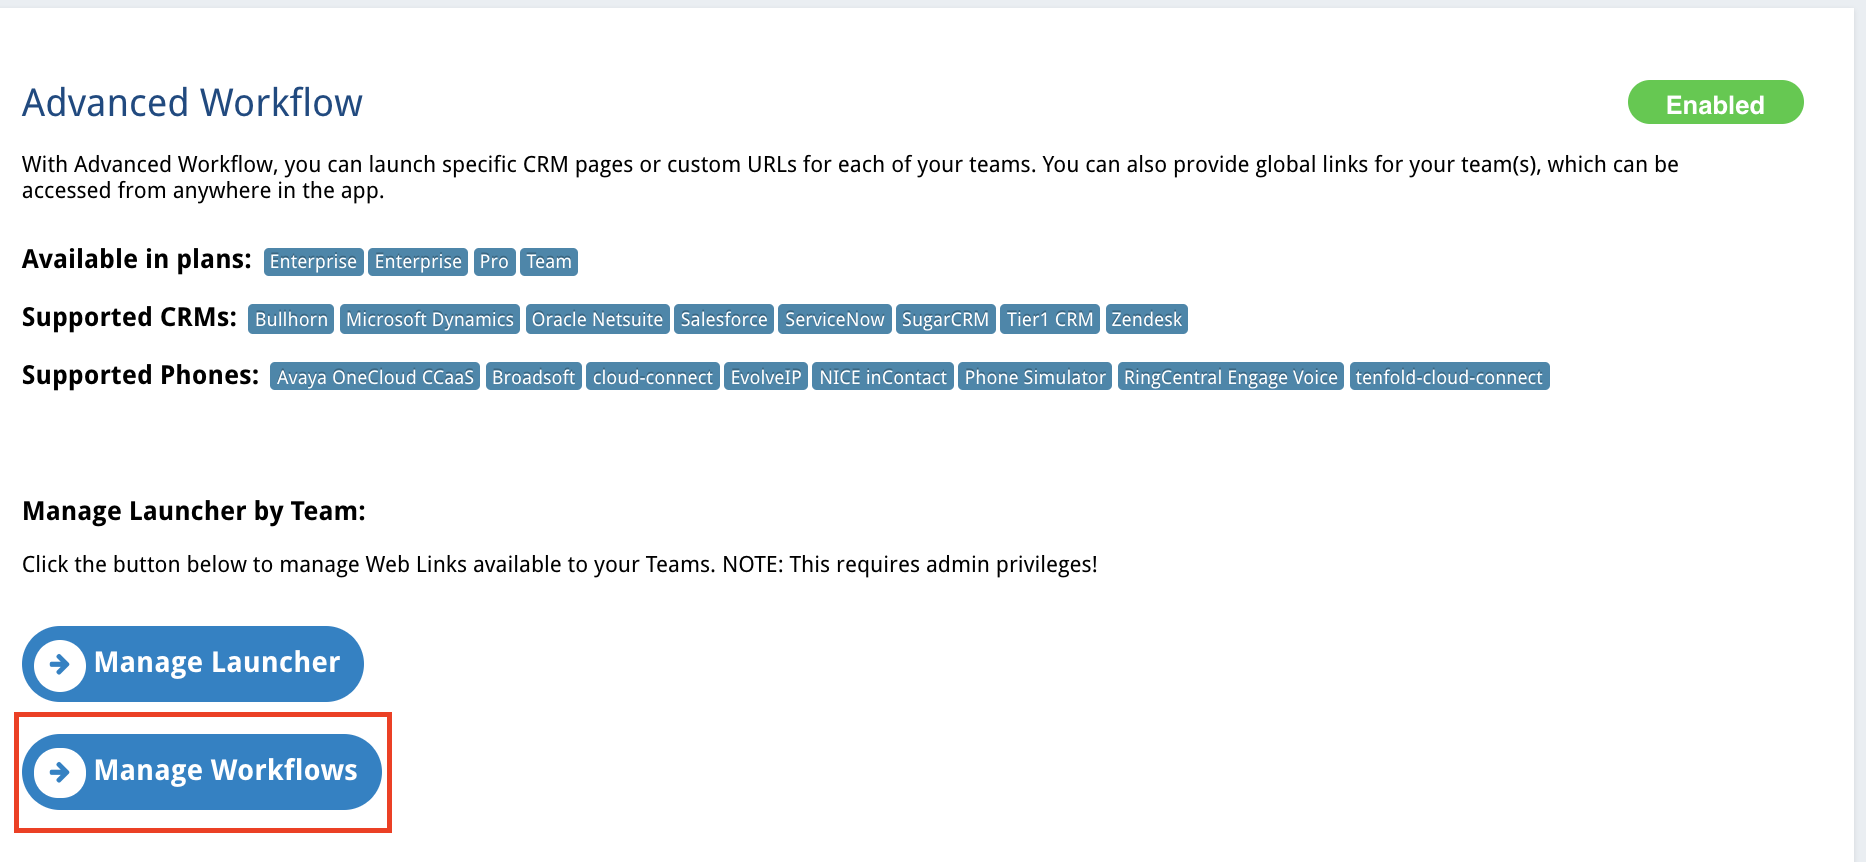
Locate Advanced Workflow in the "Features" menu on the left-hand side of your screen.
If Advanced Workflow is disabled, toggle the pill button in the top right corner to enable the feature.
Click Manage Workflow.
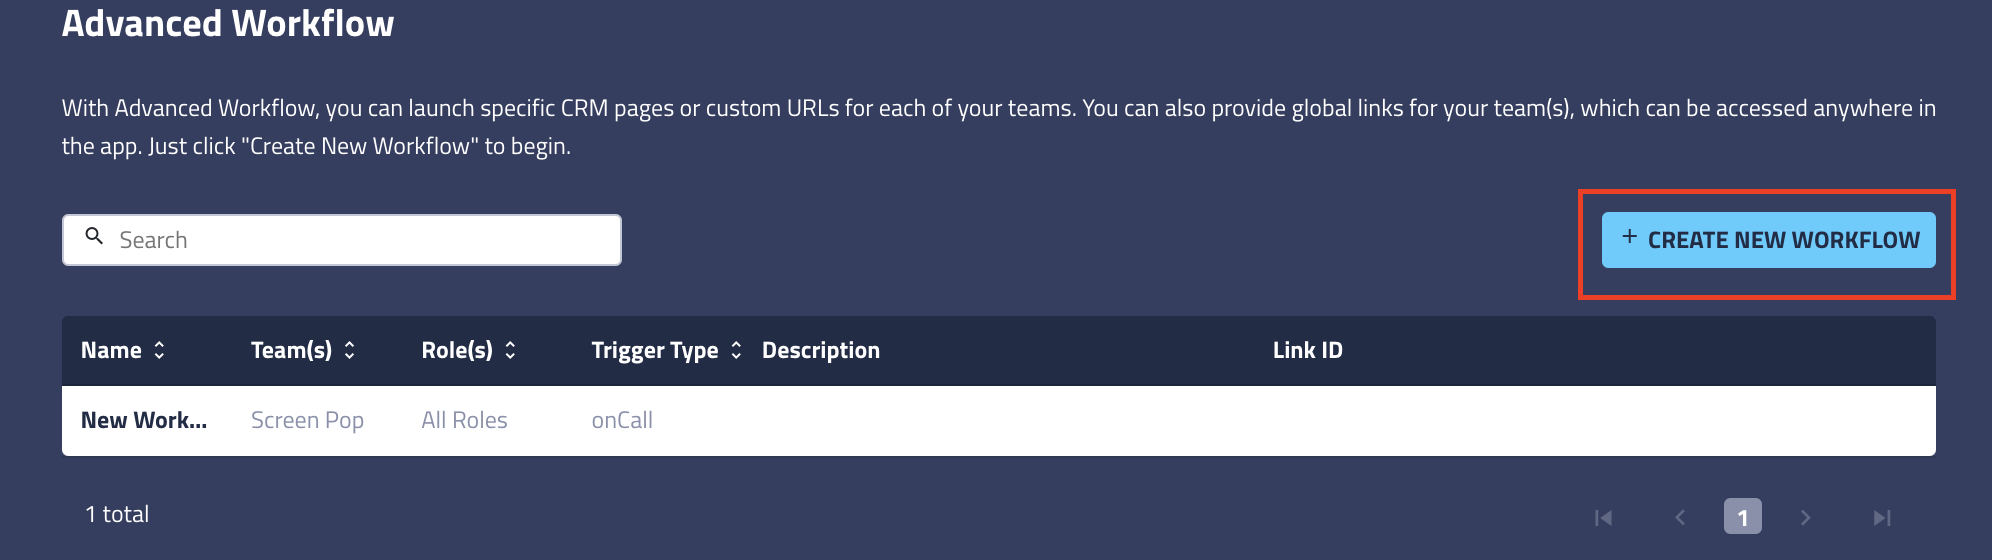
Click + Create New Workflow.
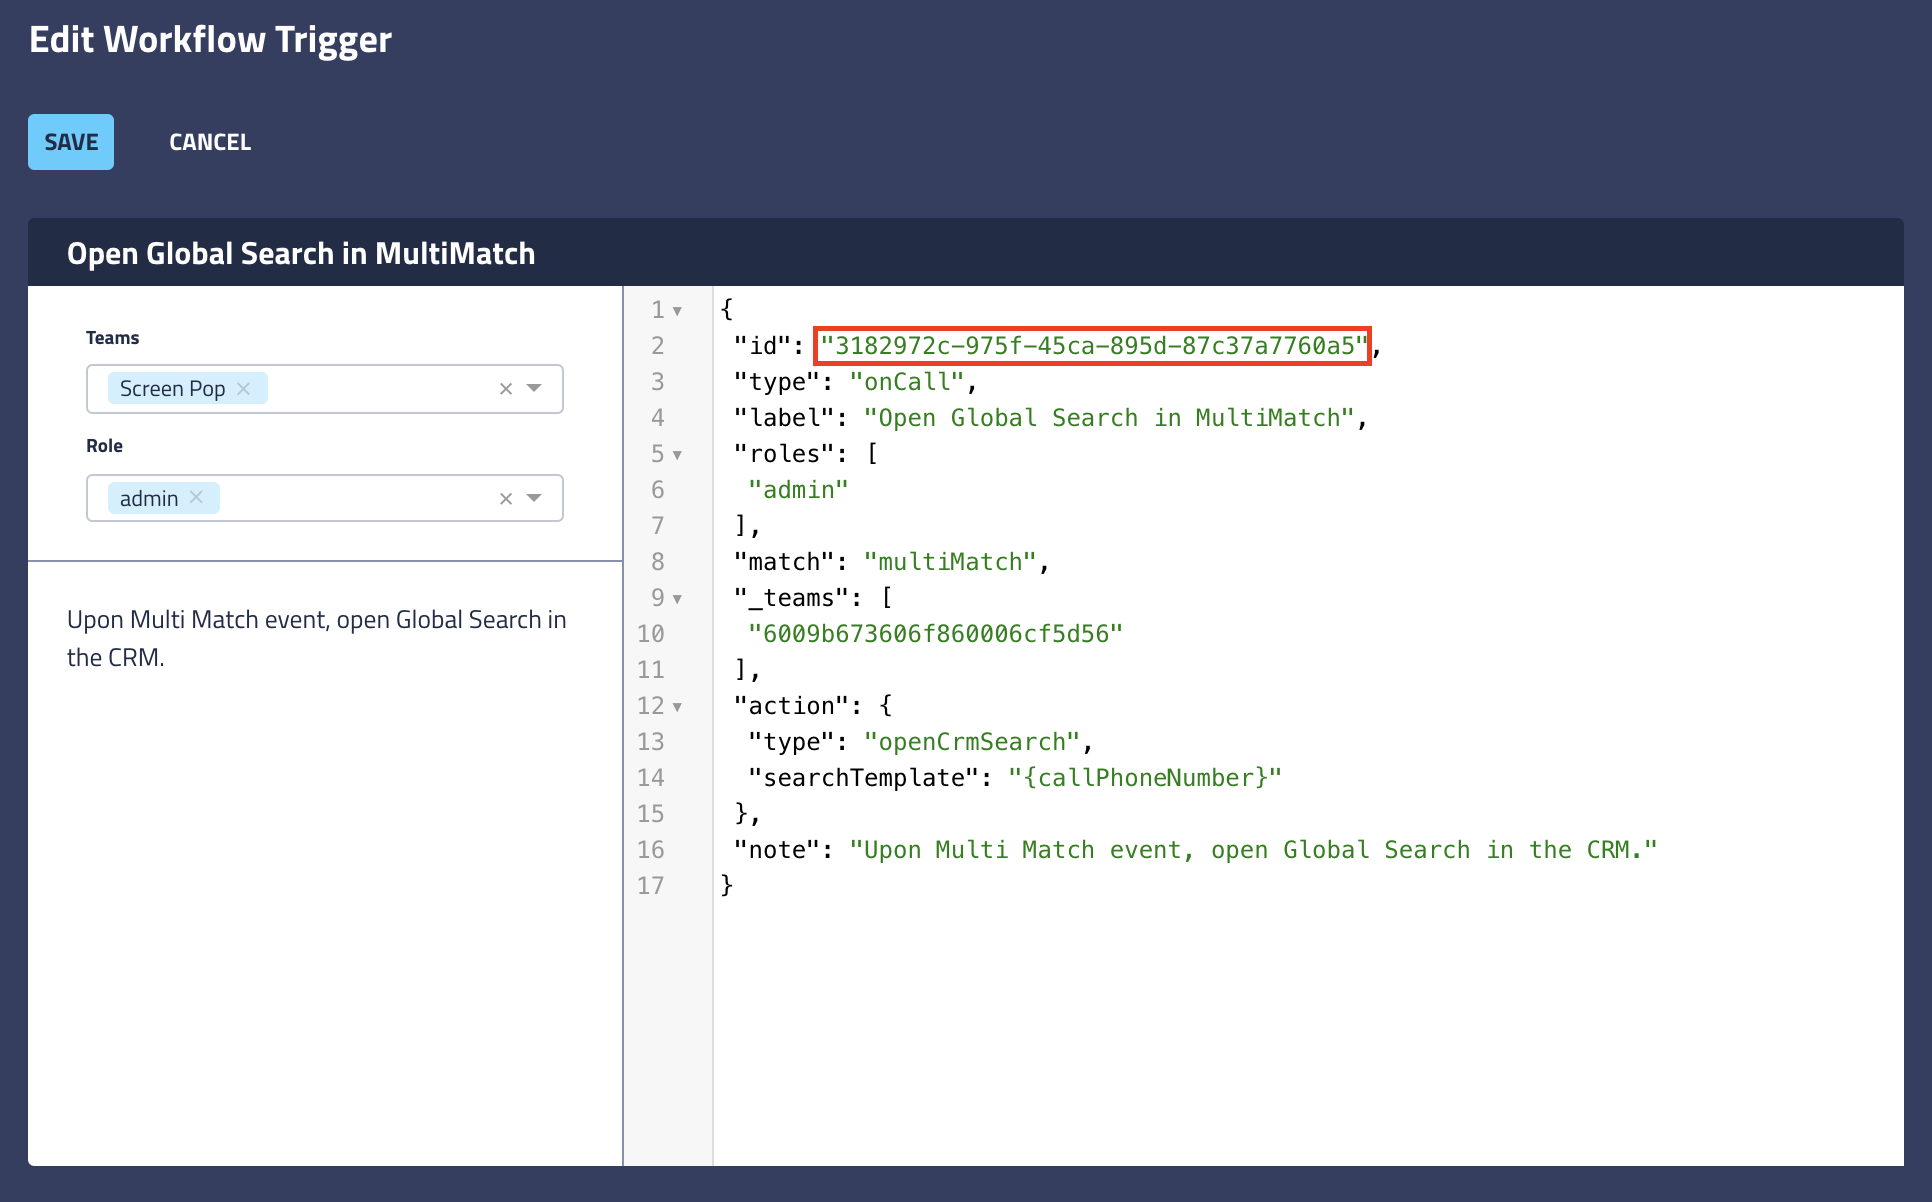
Note that the configurator has automatically generated an ID, boxed in red in the image below.
Copy this unique workflow ID for later use.

Highlight and delete all pre-populated code. Your screen should now look like this:

In place of the prepopulated code, paste the following:
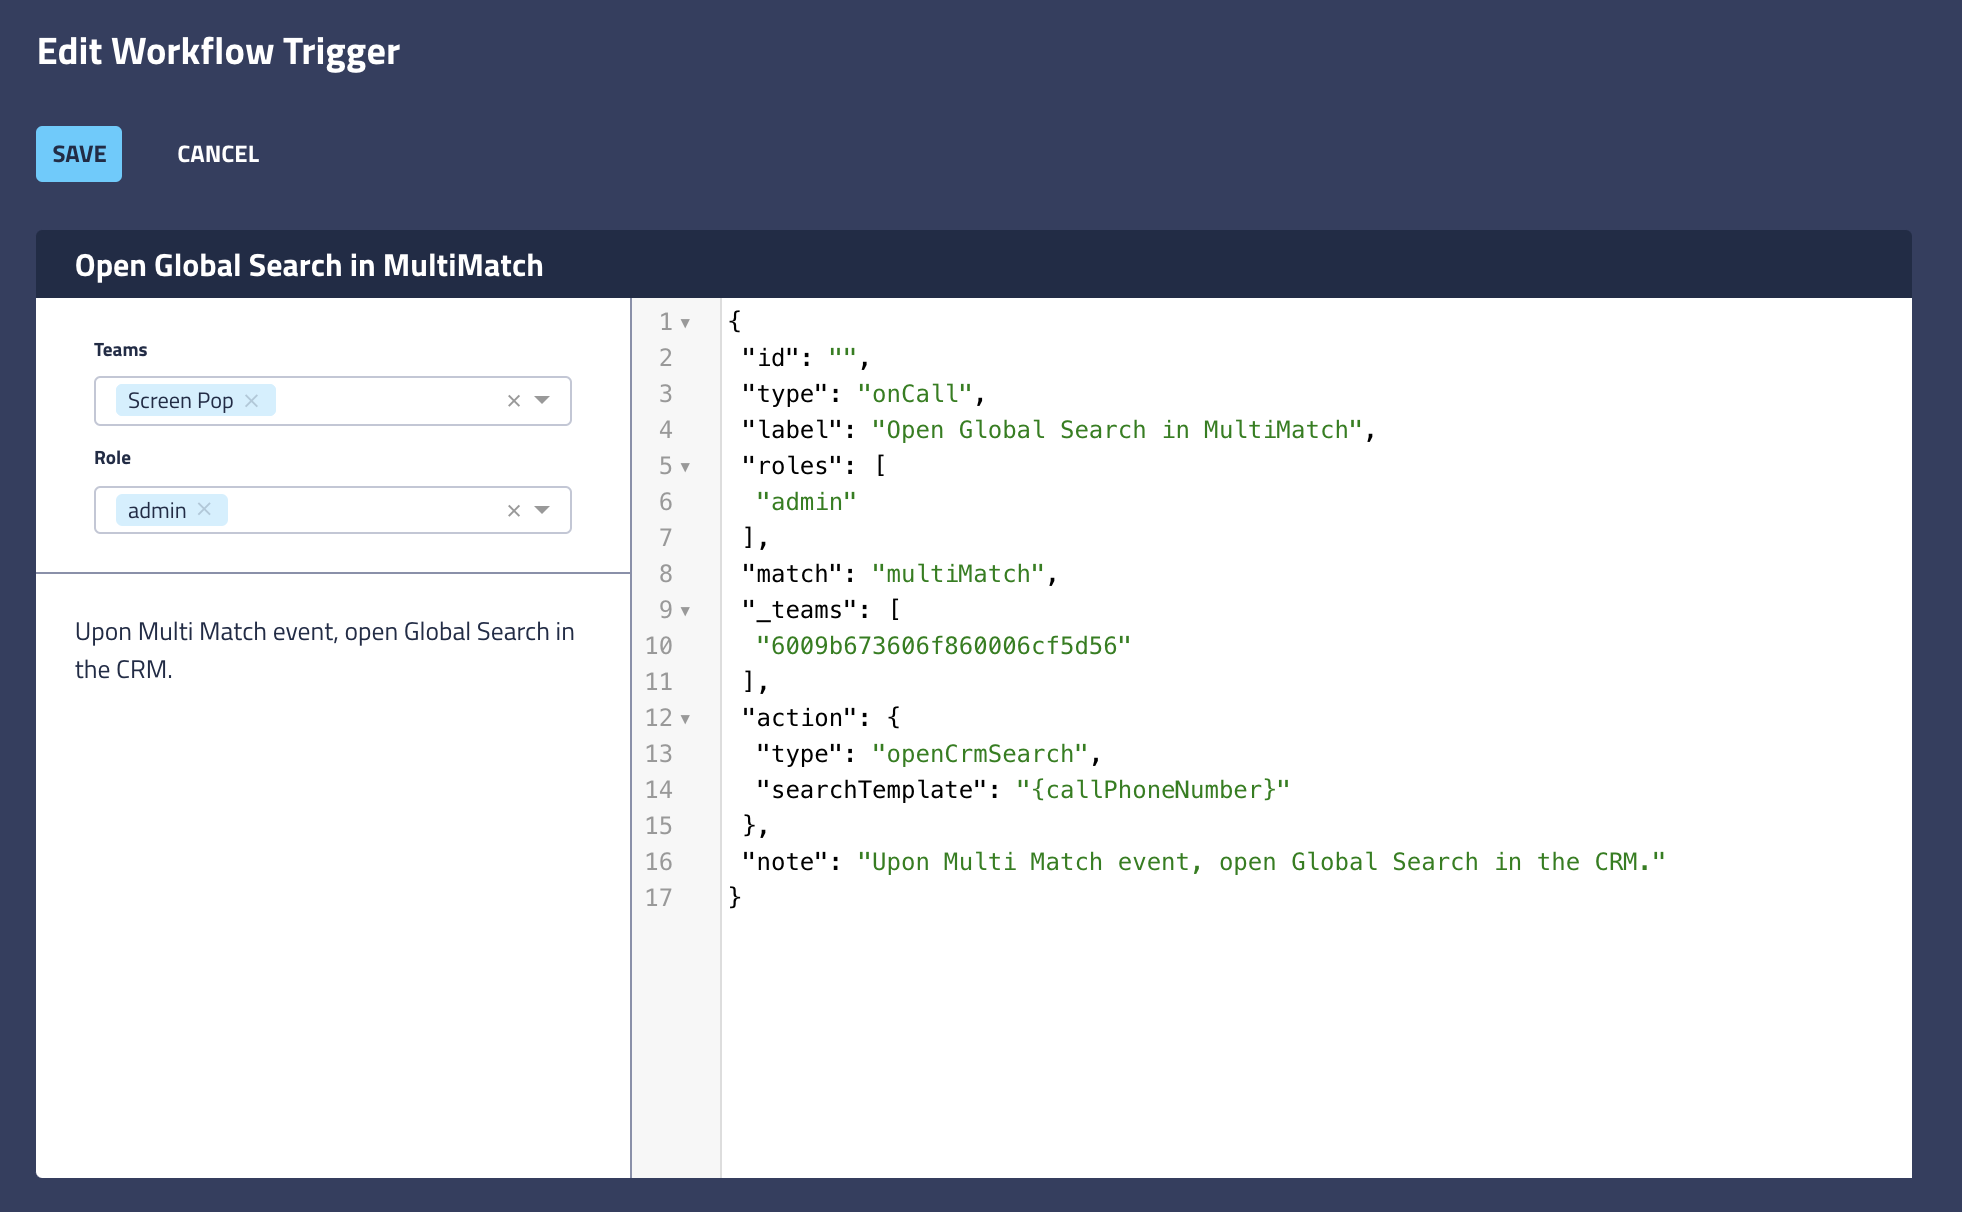
{
   "id":"<your_workflow_id>",
   "type":"onCall",
   "label":"Open Global Search on MultiMatch",
   "roles":[
      "<your_selected_roles>"
   ],
   "match":"multiMatch",
   "_teams":[
      "<your_selected_teams>"
   ],
   "action":{
      "type":"openCrmSearch",
      "searchTemplate":"{callPhoneNumber}"
   },
   "note":"Upon Multi Match event, open Global Search in the CRM."
}
In the left pane, select the teams and roles that will have access to this workflow.
Your configurator should now look similar to the following image:
Paste the workflow ID that you previously saved into the indicated location:
Click Save to publish your workflow.
Generate an inbound or outbound multi-match call to verify that your workflow trigger has been successfully implemented.