SSO with Salesforce
Overview: This article provides a walk through for configuring Salesforce as an identity provider for Tenfold Single Sign-On.
Tenfold Administrators can set up SSO to leverage Salesforce as their Identity Provider by following these steps:
 |
From Setup, use the Quick Find box to search and select Identity Provider.
Configure a domain name. Enter a sub-domain name, and check its availability. If the name is available, then click Register Domain.
Test the domain and deploy to users.
Download the certificate and metadata file after enabling Identity provider.
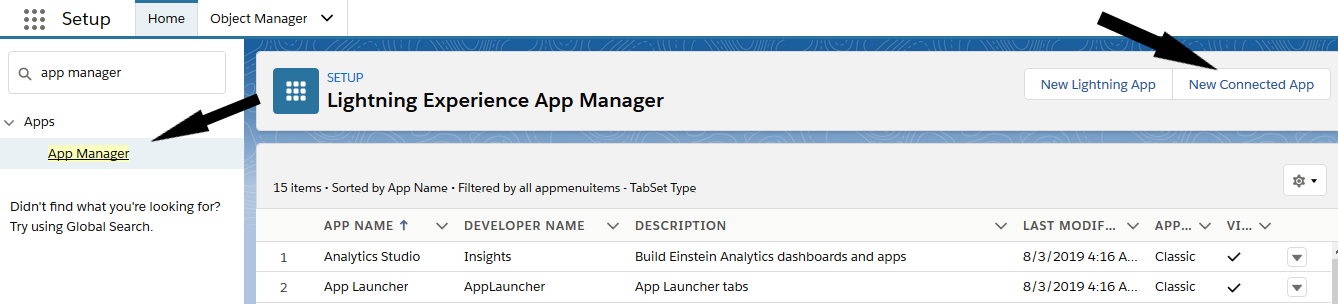
Search and select App Manager in the Quick Find Box, then click New connected App.
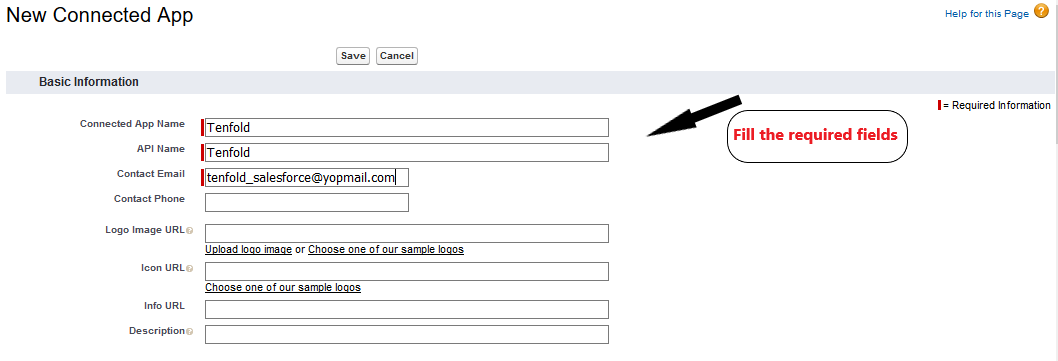
Create a new connected app and provide the details in Basic information and Web App settings:
Name the connected app as Tenfold.
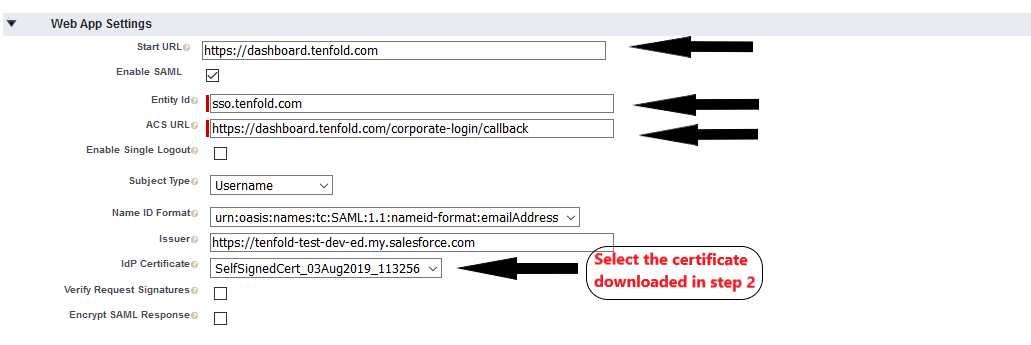
Enable SAML.
Enter the ACS URL and Entity ID.
Entity ID: sso.tenfold.com
ACS URL:
https://dashboard.tenfold.com/corporate-login/callbackSelect Subject Type as Username, Name id format to
urn:oasis:name:tc:SAML:1:1:nameid:-format:emailAddress.Select your IDP Certificate from dropdown options.
Click Save button.
Click Manage Profile and select all the profiles for which you want to grant access to use SSO.
Search and select Single Sign-on Settings in the Quick Find Box. Then, click the SAML Enabled check box to enable SAML settings.
Add additional Attribute statements and set the two to have the following name/value pairings {(firstName, user.firstName),(lastName, user.lastName)}.
NOTE: Additional Attribute statements are optional, BUT we need these set to correctly create users in Tenfold with the same name as in Salesforce. Failure to configure Email, firstName, and lastName may result in user profiles being generated incorrectly or inconsistently with the connected CRM).
In Tenfold dashboard, navigate to Single Sign-on feature. Set the domain to the value which you want your users to enter when logging in to Tenfold and upload the metadata XML file which was generated in step #2. Click save and your organization is ready to use Salesforce SSO to authenticate your Tenfold account.
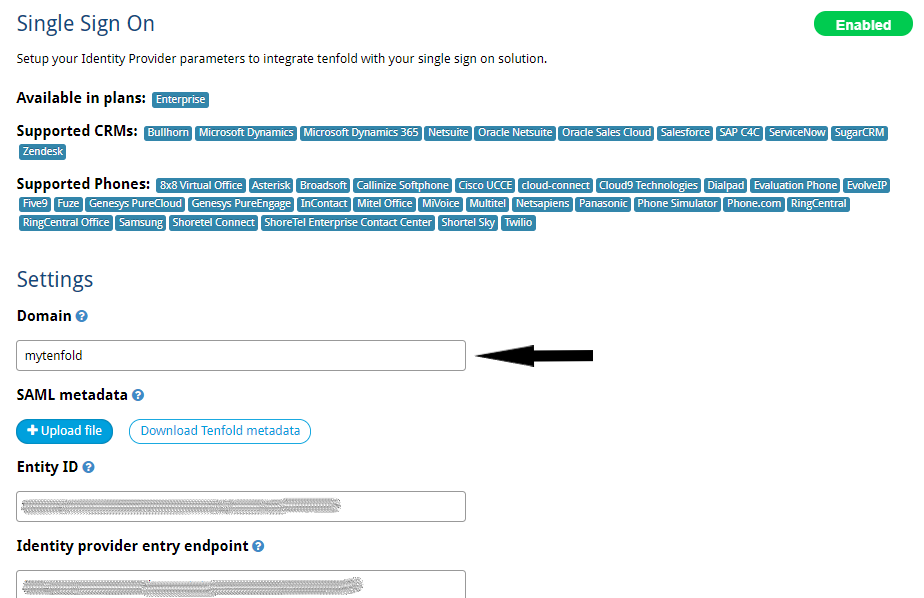
In Tenfold login page, navigate to “corporate login” tab and enter the domain name which you have configured in Tenfold’s SSO features tab in step #6. Enter your Salesforce login credentials for the first time and then you will be directed to Tenfold Dashboard.
You are ready to use Salesforce to authenticate to tenfold.
This graphic demonstrates the login flow using Salesforce:
Overview: If your organization leverages multiple, disparate Tenfold environments you will need to enable Multi-tenant within the Single Sign On feature setup to enable connectivity from a single Identity Provider (Salesforce) to the various Tenfold environments. This will allow Tenfold to know which specific environment a user should authenticate into on sign on within Salesforce
Select the 'Enable Multi-Tenant' setting at the bottom of the Single-Sign On page for each of the Tenfold environments that will be leveraging SSO from a single Identity Provider.
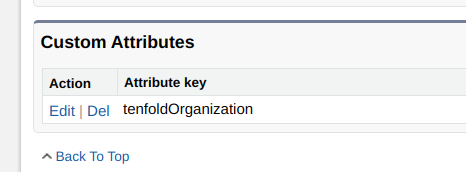
Within the connected application within Salesforce, at the bottom of the setup page, you will note a section to configure 'Custom Attributes' for SAML. Create a new 'Custom Attribute' which can be user to associate users to the proper Tenfold environment.
This could be a new, custom field such as 'Tenfold Organization,' or an existing field such as Call Center ID. What is important is that the value should be unique and align 1:1 with which Tenfold environment they are using. Each user should have the value entered that aligns with the proper Tenfold environment on their Salesforce user record.
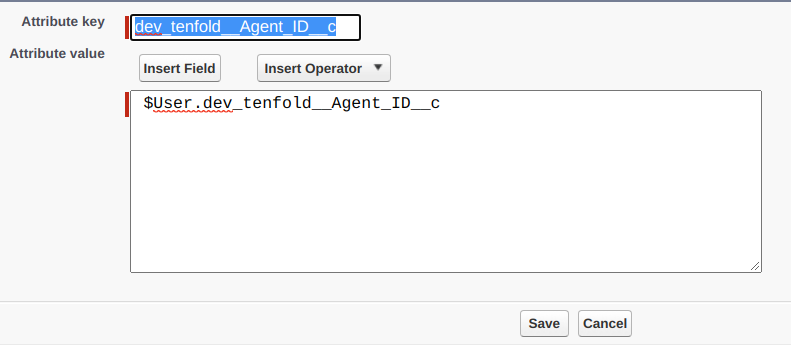
Select the desirable field from the 'User' object. The field should be a free text, or formula field. Some fields, such as picklist fields, may not be emitted in the SAML payload.
Save your changes within Salesforce.
Re-upload the SAML metadata file to each of the Tenfold environments following the above changes.
Select the 'Custom Field' drop down from each of the Tenfold environments you are enabling Multi-tenant SSO. Enter in the Custom Field that you configured in the Custom Attribute section of the Salesforce Connected app.
Note that custom fields with Salesforce will need to be entered exactly as the API field is written ie "tenfold_organization__c". Enter in the unique value into the value section that aligns with the user population groups in Salesforce associated to that Tenfold environment. Ensure that each Tenfold environment has its own unique 'Domain' name.
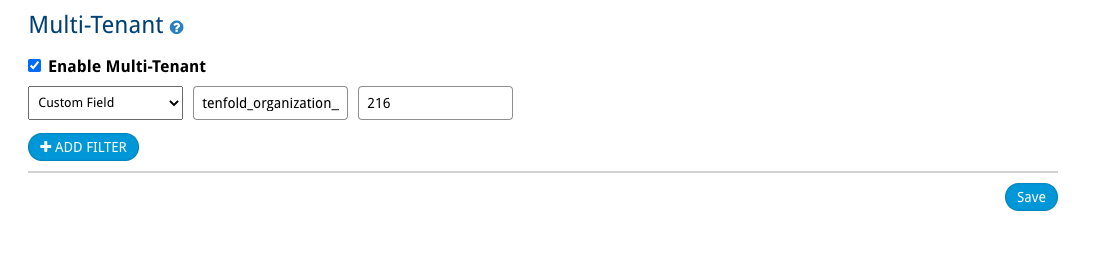
Press Save in Tenfold.