Omni-Channel
This article provides a brief explanation of Tenfold & Salesforce Omni-Channel capabilities and a step-by-step configuration guide.
Overview
The Tenfold Omni-Channel integration federates agent status between the telephony system and Salesforce Omni-Channel. This integration enables organizations to properly set availability in both systems so that agents may serve customers across multiple channels while avoiding cognitive overload.
In other words, when an agent is actively handling a call, Tenfold will change the Salesforce status to reflect the equivalent of "Unavailable." This functionality also allows agents to easily toggle between various statuses configured within Salesforce, ensuring that their availability is accurately reflected.
Requirements
Salesforce and telephony integration
Tenfold must be connected to both Salesforce and your phone system. The basic integration must be working as expected. In other words, the Agent UI must display properly for inbound and outbound calls and those calls must log to the CRM.
Salesforce Omni-Channel integration is only supported via Tenfold’s embedded UI in Salesforce (i.e. OpenCTI).
Refer to the Tenfold Salesforce Integration Guide for more information..
Salesforce Omni-Channel configuration
To leverage Tenfold with Salesforce Omni-Channel, you must have Salesforce configured to support Omni-Channel. See the Omni-Channel for Administrators document for more information.
Telephony system Agent Status configuration
The Agent Status feature in Tenfold Dashboard must be configured and working for your phone system.
Contact support@tenfold.com for more information.
Configuration
Tenfold Dashboard
Configure the base configuration as specified in this guide.
Configure Tenfold to prioritize the voice channel as specified in this guide.
Configure phone call monitoring as specified in this guide.
Configure CRM work item monitoring as specified in this guide.
Salesforce
Disable Update Status on Decline in Salesforce Presence Configurations
Update the Salesforce workflow rule tenfold_AgentWork to trigger when an agent accepts work by updating the formula in the Rule Criteria to the following as described in the Salesforce Configuration section of this guide.
ISPICKVAL(Status, "Closed") || ISPICKVAL(Status, "Opened")
Advisories
Manual status changes by the user must be performed in Tenfold UI, not in Omni-Channel
Omni-Channel configurable capacity is not considered for telephony status
Capacity is always treated as “1” once work is accepted from Omni-Channel setting telephone channel to “busy”
User must verify and change status in Tenfold and Omni-Channel after login
Normal behavior is that Tenfold and Omni login as “Busy” but there have been cases in which one stays offline updating the other to offline
Manual steps:
If an agent is going to break, the agent must set status manually in Tenfold (before completing current work). This status will prevail in Tenfold and Omni once set. (flow: “Call E2E process without Omni-Channel Work and Agent Busy After Call”)
Update Status on Decline must be disabled in Salesforce Presence Configurations
During setup of the Salesforce Omni-Channel integration in Tenfold Dashboard, Tenfold will create a Workflow Rule and Outbound Message for sending agent status events to Tenfold Cloud. Tenfold Admins can implement Omni-Channel functionality by following these simple steps:
Verify that the prerequisites mentioned in the Requirements section of this guide have been met before proceeding.
Navigate to your Tenfold Dashboard.
Select the Features tab.
Locate and click on the Agent Status feature in the menu on the left-hand side of your screen.
Enable the Agent Status feature if it is disabled.
Select Salesforce and your voice platform in the Integrations section and then click Save.

Scroll to the Status Mapping section to configure standard statuses.
Example 1. Recommended mapping for Salesforce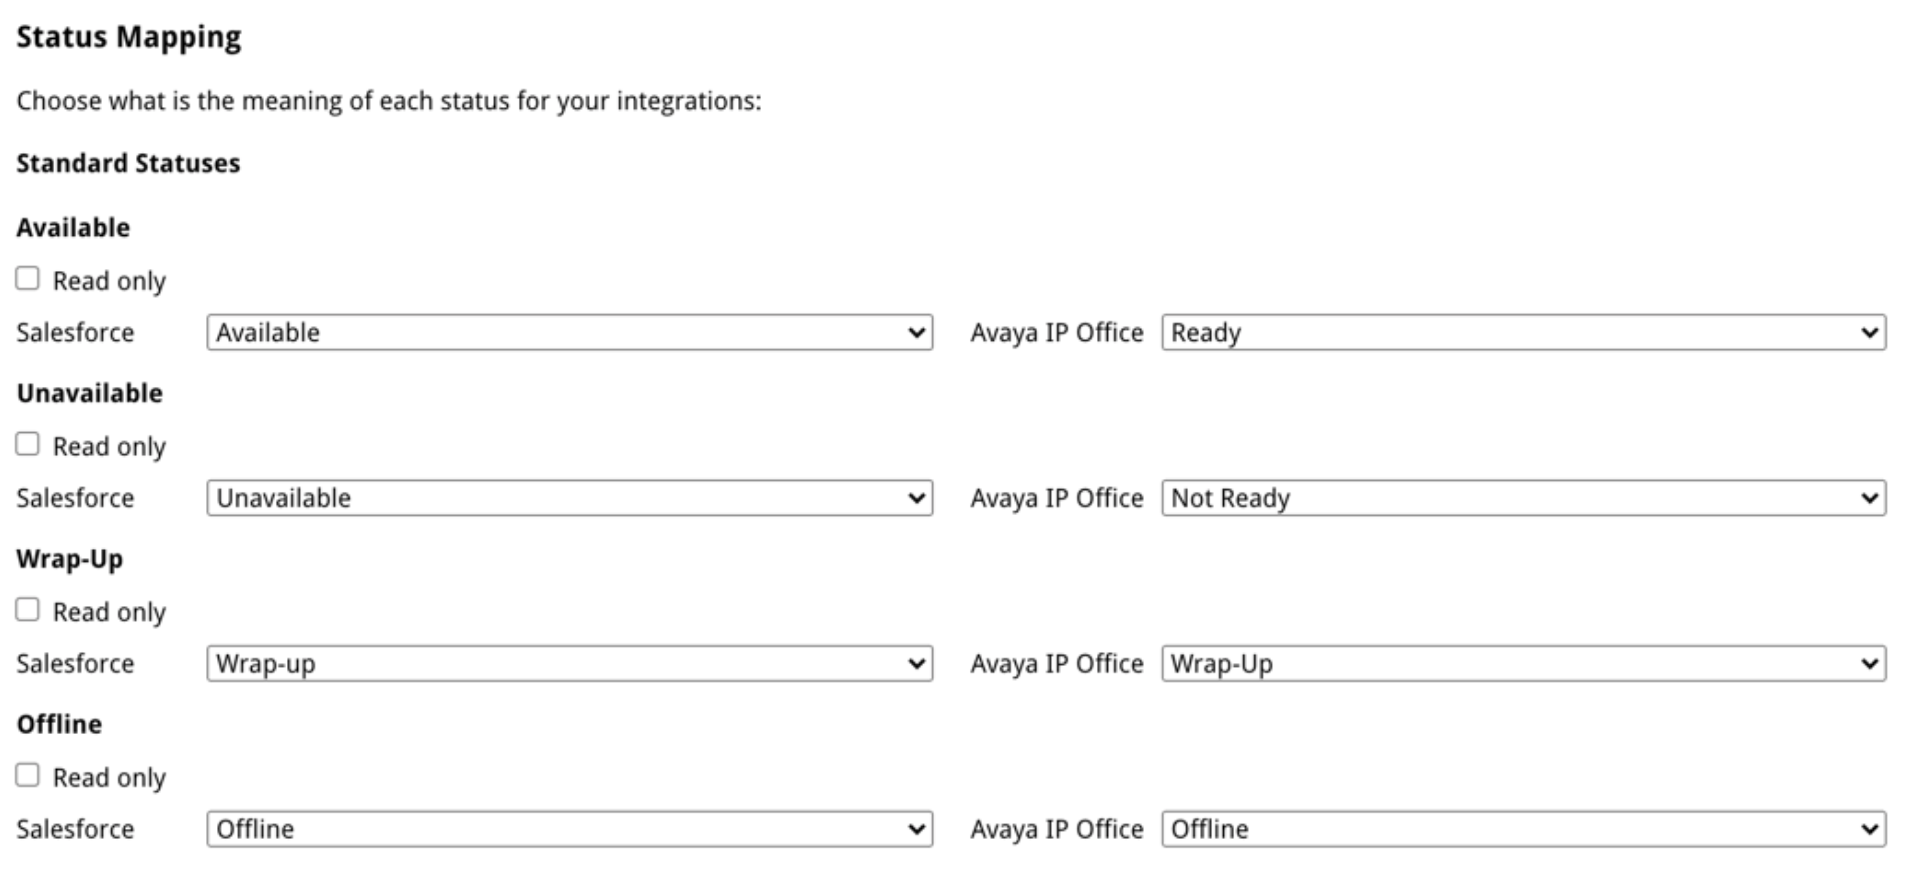
Beneath each standard status (Available, Unavailable, etc.) you will have the option to configure a custom status. The image below demonstrates mapping custom statuses to Salesforce reason codes and Avaya Aux Codes configured in the Unavailable Reasons section. The 'Reason' is what will display in the Tenfold UI for the agent:

Scroll down to Auto update agent status based on call monitoring and check the box next to 'Enabled'. This preference ensures that when the agent is actively on a phone call, Salesforce will show the appropriate reason code.

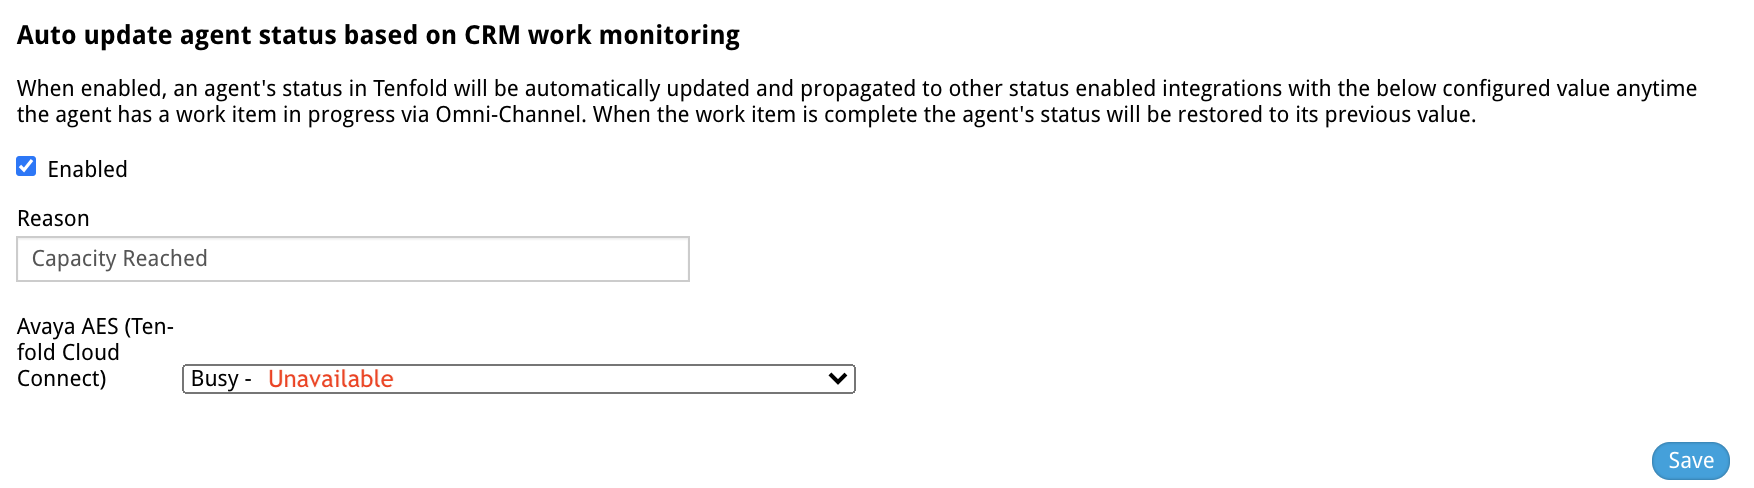
If you would like the phone system to make the agent Unavailable when the agent is performing work in Salesforce which counts towards their capacity, you will need to configure the auto-update agent status based on CRM work monitoring preference. This preference will update the phone system with the configured status anytime Tenfold detects the agent is performing activities related to a work item in Salesforce which impacts their capacity.
This is a binary preference. Meaning, the agent is or is not working on something, and calculating available capacity is not a factor. Below is an example of one such configuration:
Click Refresh in the Detect Statuses Changes button to ensure everything is synced properly with Salesforce.
Click Save on the feature.