ServiceNow IT Service Management (ITSM) Integration Guide
Overview: This article provides a quick walk-through for connecting your ServiceNow instance to your Tenfold Dashboard via OAuth using a dedicated API user and the ITSM Plugin to service Users and Incidents.
Audience
This document is directed to customers and prospective customers interested in using Tenfold in a ServiceNow environment. Those who will perform the procedures described in this guide should have a basic level of familiarity with ServiceNow APIs, ServiceNow administration, general networking, and Tenfold.
Goals
The goal of this document is to provide knowledge, reference, and procedural information necessary to understand a proposed ServiceNOW/Tenfold integration.
This document is NOT intended as a specific system or network design document. If further clarification is needed, consult with your Tenfold Customer Success Manager (CSM) and/or Technical Account Manager (TAM).
Terminology
To ensure a common frame of reference, this guide uses the following terms in conjunction with this ServiceNOW integration:
Application Programing Interface (API): A set of clearly defined methods of communication used by Tenfold for reading and writing data.
Click to Dial: A feature in the Tenfold UI which allows agents to click a phone number to dial a contact.
Tenfold Cloud: A set of Web Services that receives events from the telephony system and takes further action such as querying and saving to the CRM.
ITSM: A ServiceNow offering. IT Service Management (ITSM) provides a solution for supporting internal customers..
CTI Connector Application: The base package which contains the functionality layer of the embedded Tenfold UI for ServiceNow.
Tenfold UI / Tenfold App: The top level package which contains the presentation layer of the embedded Tenfold UI for ServiceNow.
Customer responsibilities
You are responsible for supplying the physical and/or IP connection(s) to ServiceNOW and LAN, and for obtaining and loading any licensing required by ServiceNow. You are also responsible for configuring ServiceNOW to support the Tenfold integration.
Integration overview
The Tenfold App for ServiceNow is installed from the ServiceNow app store into the customer instance. It adds not only the necessary roles and fields used by the Tenfold integration, but also the necessary tables and endpoints used.
During installation, the customer will install the Tenfold App Tenfold for ServiceNow ITSM. Look into other documentation in our portal for instructions regarding the CSM Plugin.
Note that the Tenfold integration includes embedded entitlements for the custom tables deployed by Tenfold thus do not require any additional custom table entitlements within ServiceNow.
Requirements
Connection requirements
ServiceNow instance accessible by Tenfold Cloud via port 443
Dedicated Service Account (i.e. API User)
Version requirements
Tenfold supports N-2 versions of ServiceNow where N is the latest release.
Dependencies
Openframe Plug-in
A ServiceNow plug-in that enables support for phone calls and the whole CTI integration (support for click to dial, embedded clients, etc) inside ServiceNow. This plugin is mandatory and the Tenfold integration will not work properly without it. More details on openframe can be found here.
IMPORTANT: All Tenfold apps for ServiceNow depend on the openframe plugin.
ITSM Plug-in
The IT Service Management plug-in adds support to several modules in ServiceNow, among them, support for Incident management. The requirement for this plugin depends on the customer user cases and if Incident support is not required, it doesn’t need to be installed. More details on ITSM can be found here.
CTI Connector App
The CTI Connector App installs all fields, tables and roles used by the integration. The CTI Connector App can be thought of as a library. During the installation of Tenfold the customer will be prompted to install the CTI Connector App.
Data schema
ServiceNow tables
Table name | Description |
Incident Task (incident_task) | ITSM module for Tasks (extends from task) |
Incident (incident) | Table for storing incidents associated with users |
Phone Call (sn_openframe_phone_log) | Table for storing phone calls |
Task (task) | Table for storing tasks |
User (sys_user) | Table for storing users |
Custom fields
The following custom fields are added by the app.
Field name | Table | Description |
Additional Phone 1 (APP_PREFIX_additional_phone_1) | User (sys_user) | Additional phone field for user |
Additional Phone 2 (APP_PREFIX_additional_phone_2) | User (sys_user) | Additional phone field for user |
Additional Phone 3 (APP_PREFIX_additional_phone_3) | User (sys_user) | Additional phone field for user |
Call Purpose (APP_PREFIX_call_category) | Phone Call (sn_openframe_phone_log) | Disposition to store call purpose |
Caller (APP_PREFIX_caller_sys_id) | Task (task) | Field to store the caller associated with a follow up task |
Caller (APP_PREFIX_caller_sys_id) | Phone Call (sn_openframe_phone_log) | Field to store the caller associated with a phone call |
Description (APP_PREFIX_description) | Phone Call (sn_openframe_phone_log) | Field to store call notes |
Owner (APP_PREFIX_created_by_sys_id) | User (sys_user) | Owner of the user |
Owner (APP_PREFIX_created_by_sys_id) | Task (sys_user) | Owner of the task |
Staging tables
In addition to the custom fields mentioned above, it’s important to note that Tenfold also creates tables and fields to implement the staging tables mentioned previously in this document. For each of the SN tables used, there’s an equivalent staging table and a mapping that will copy data from the staging table to the actual SN table). Like so, the fields in the staging tables all maps to the ones in the standard SN tables). The APP_PREFIX string above refers to the unique prefix of each individual app (see App scopes section below).
Custom views
While it’s possible to fully customize all forms and views in ServiceNow, the app already installs a custom view for the phone call entity that already includes the custom fields Tenfold uses. To switch to this view or to further customize the phone call (or other) views, refer to the Installation section below.
App scopes
To avoid conflicts between each installed app, SN gives each app a unique prefix, that precedes each field, table or custom entity created by the app. The relevant prefixes are:
App | App scope |
Tenfold for ITSM | x_calli_cti_itsm |
Roles and permissions
Each Tenfold App creates its own custom role, and the integration user used to authenticate against ServiceNow and allow data to flow between TF and SN needs to have this role assigned. They are:
App | App scope |
Tenfold for ITSM | x_calli_cti_itsm.user |
Matching and searching
ITSM
Match against Users
Associate calls to Incidents
Authentication with ServiceNow
Authentication with ServiceNow happens via an OAuth client installed on the customer instance along with the app. For instructions on how to authenticate against SN, see the Installation section below.
Installation and configuration
The below steps describe the installation procedures for connecting Tenfold to ServiceNow and enabling the Embedded Tenfold UI for the ITSM Plugin.
Install the Tenfold app for ServiceNow
Customer instances should install the app from the app store.
App name | Description |
Tenfold for ITSM | New app for customers that require support to ITSM modules only |
During installation you will be prompted to install the CTI Connector App which Tenfold depends on.
 |
This will generate a request to Tenfold for approval for x_calli_cti_itsm. After Tenfold approves the request, complete the install of the CTI Connector App.
After the install of the CTI Connector App is complete, you may revisit the Tenfold App in the ServiceNow store and complete the installation.
Enable the Tenfold app within ServiceNow
The embedded client for ServiceNow will not be active by default when the Tenfold for ServiceNow apps are installed. To enable the embedded client perform the following steps.
In the navigation filter, search for “openframe”. Click on New
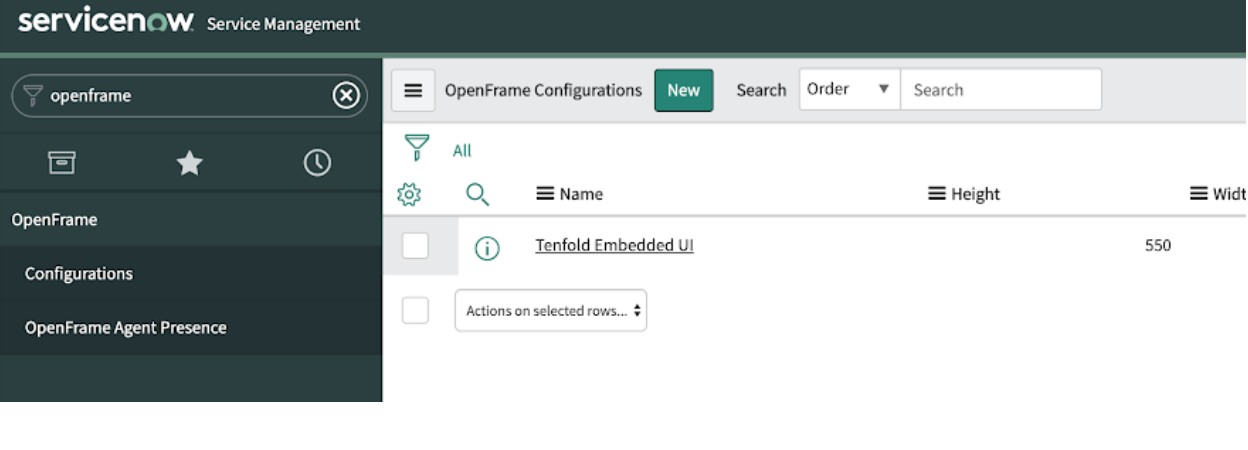
Provide values for Name, Title, Width, Height and URL. Recommended values are below:
Title
Description
Name
Tenfold
Title
Tenfold
Active
Check the box
Width
283
Height
550
Icon Class
icon-phone
Order
1
URL
https://app.tenfold.com/servicenow.html?base=YOUR_INSTANCE_HOST
If your service now instance is, for example
https://ven03444.service-now.com
Then the URL for the embedded client should be
https://app.tenfold.com/servicenow.html?base=https://ven03444.service-now.com
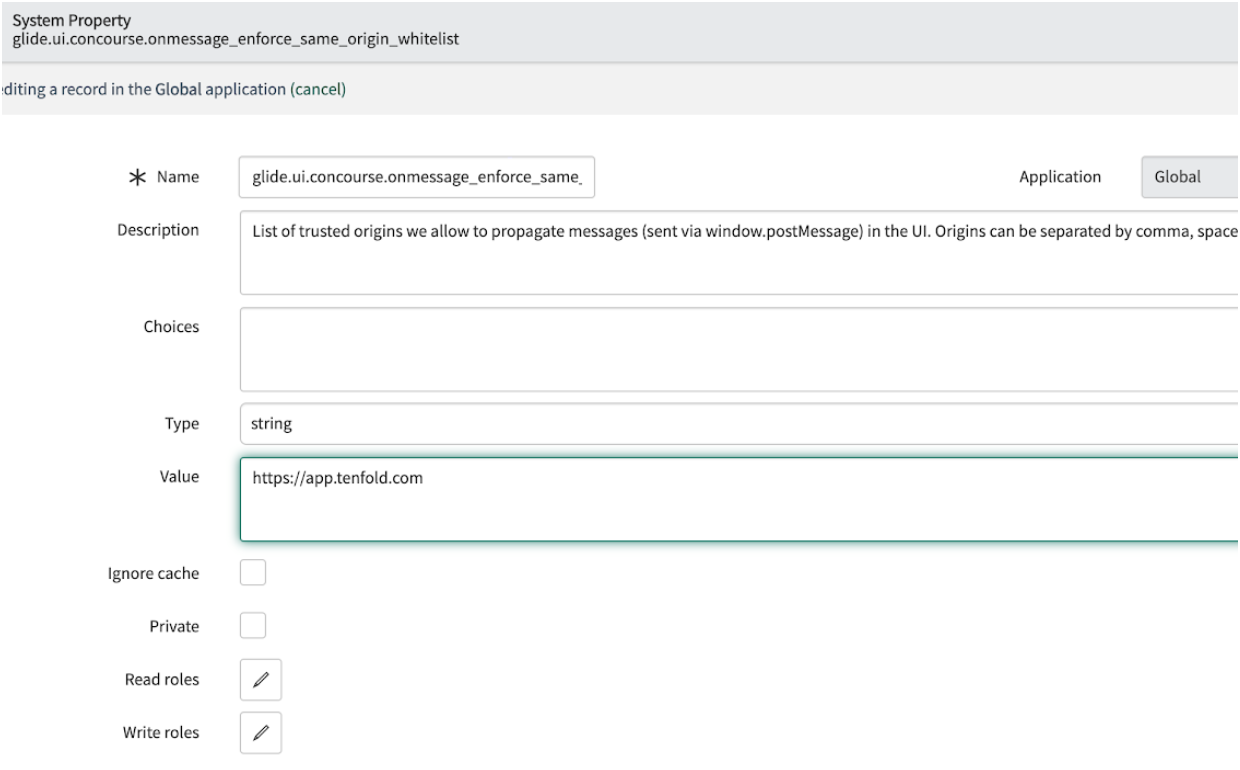
In the "Filter navigator" type "sys_properties.list" and press "enter".
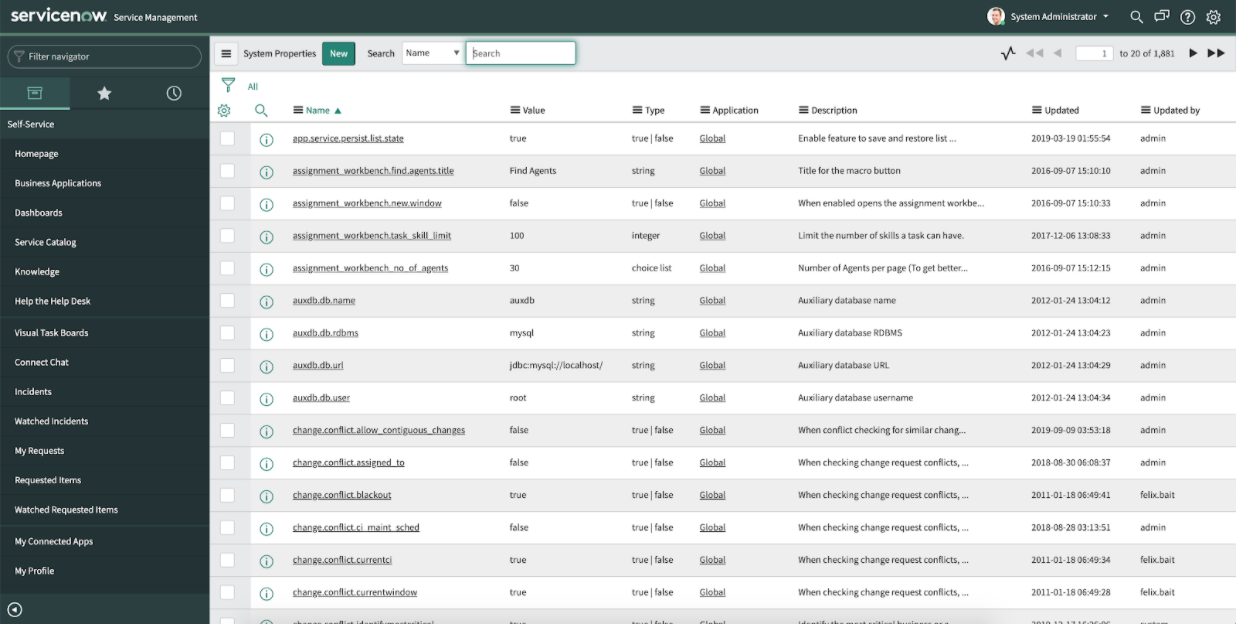
Search for the property
glide.ui.concourse.onmessage_enforce_same_origin_whitelist.Edit this property and add "https://app.tenfold.com" to the values.
Refresh the screen and you should see a phone icon. Click on it and you should see the embedded client:
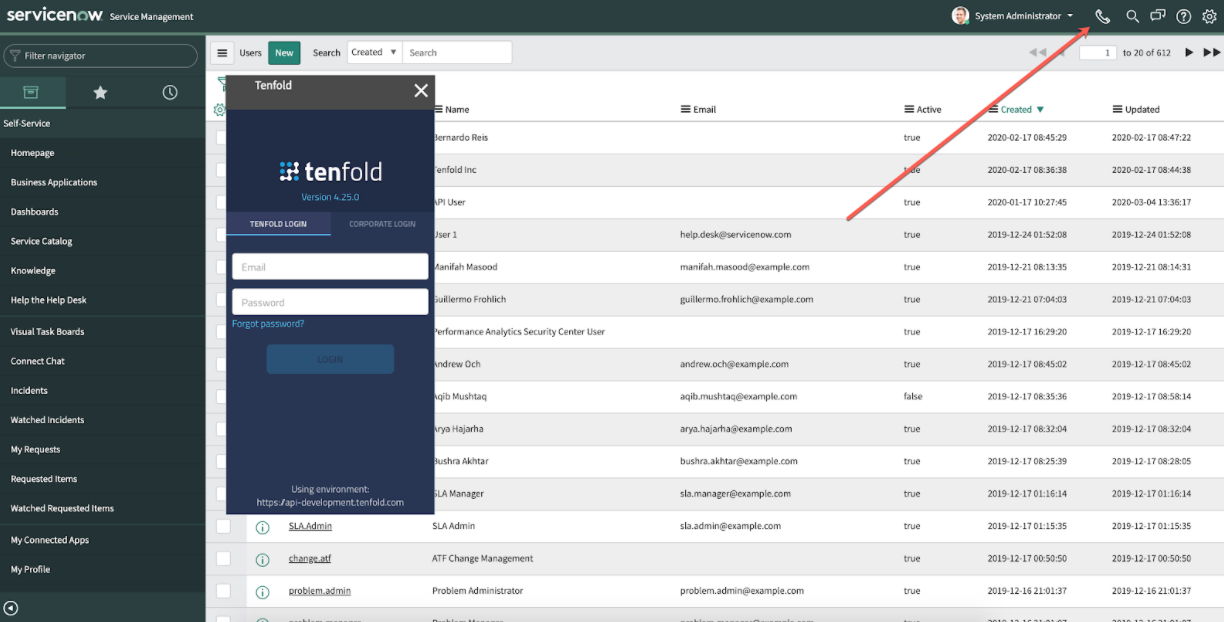
Note: You may need to clear your browser cache if the Tenfold UI is not displaying after completing this step.
Connect Tenfold Cloud with ServiceNow
The following section describes the steps for connecting Tenfold Cloud with ServiceNow.
The Tenfold app for ServiceNow must be installed before starting this process.
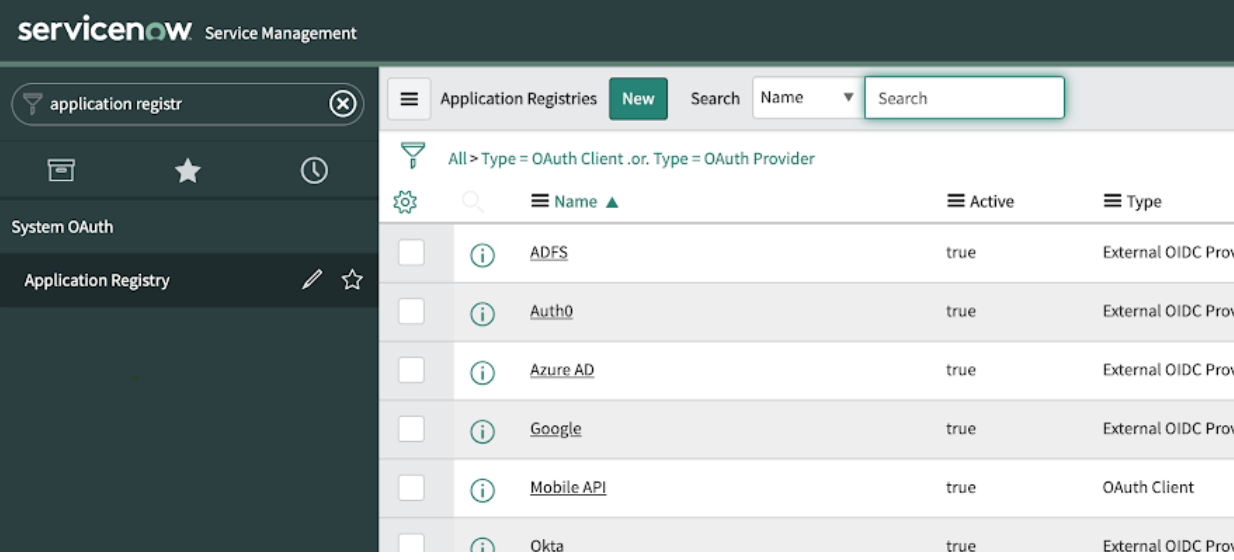
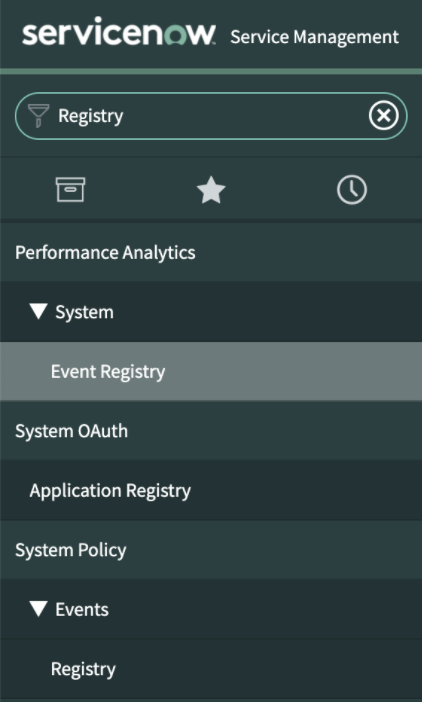
In the ServiceNow instance, navigate to Application registry.
Create an OAuth client. To do so, make sure the application that should be related to the OAuth Client is selected. That can be done as follows:
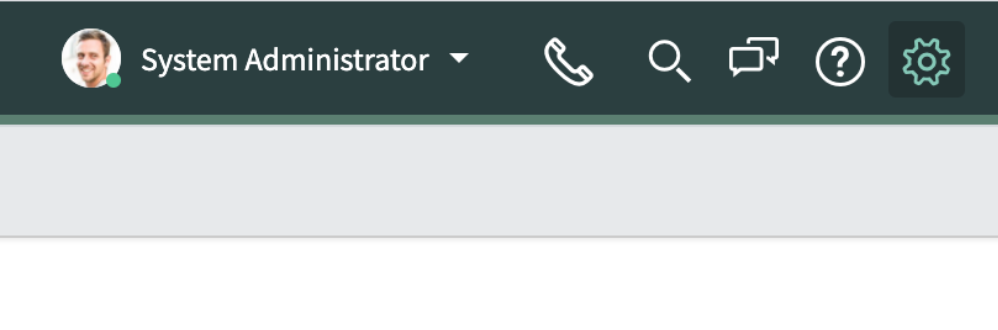
2.1 Click on the gear icon at the top right corner.
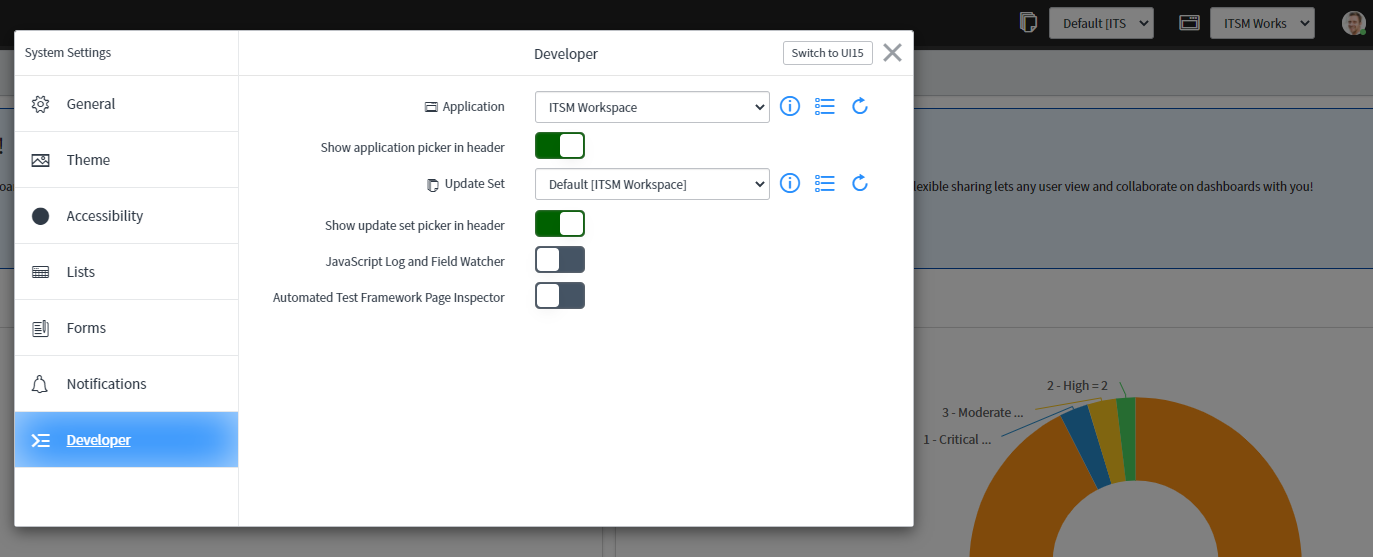
Click on the Developer tab and make sure the correct application is selected in the “Application” dropdown.
2.3 In the navigation filter, type “Application Registry”
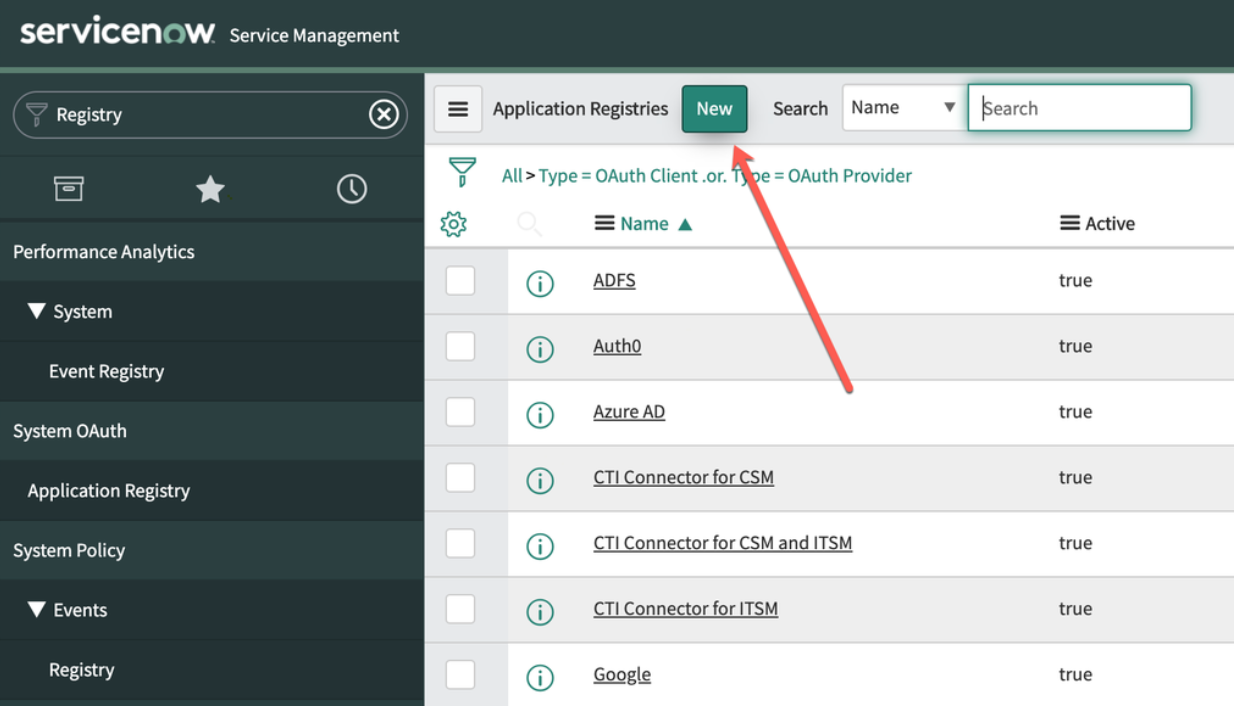
Click New.
Click on “Create an OAuth API endpoint for external clients”

Complete the fields as follows:
Title
Description
Name
Can be anything. Usually we use “Tenfold for ServiceNow”
ClientID
Auto generated and can’t be changed
Client Secret
Can be manually provided or left empty. If left empty, ServiceNow will generate a random password once the form is saved
Redirect URL
https://api.tenfold.com/v1/third-party/oauth/servicenow/cti-connector/callback
Logo URL
Not Required. That image is used in the authorization screen
Write down the client ID and client secret (the client secret can be seen by clicking on the locker icon). This information will be input into Tenfold Dashboard.
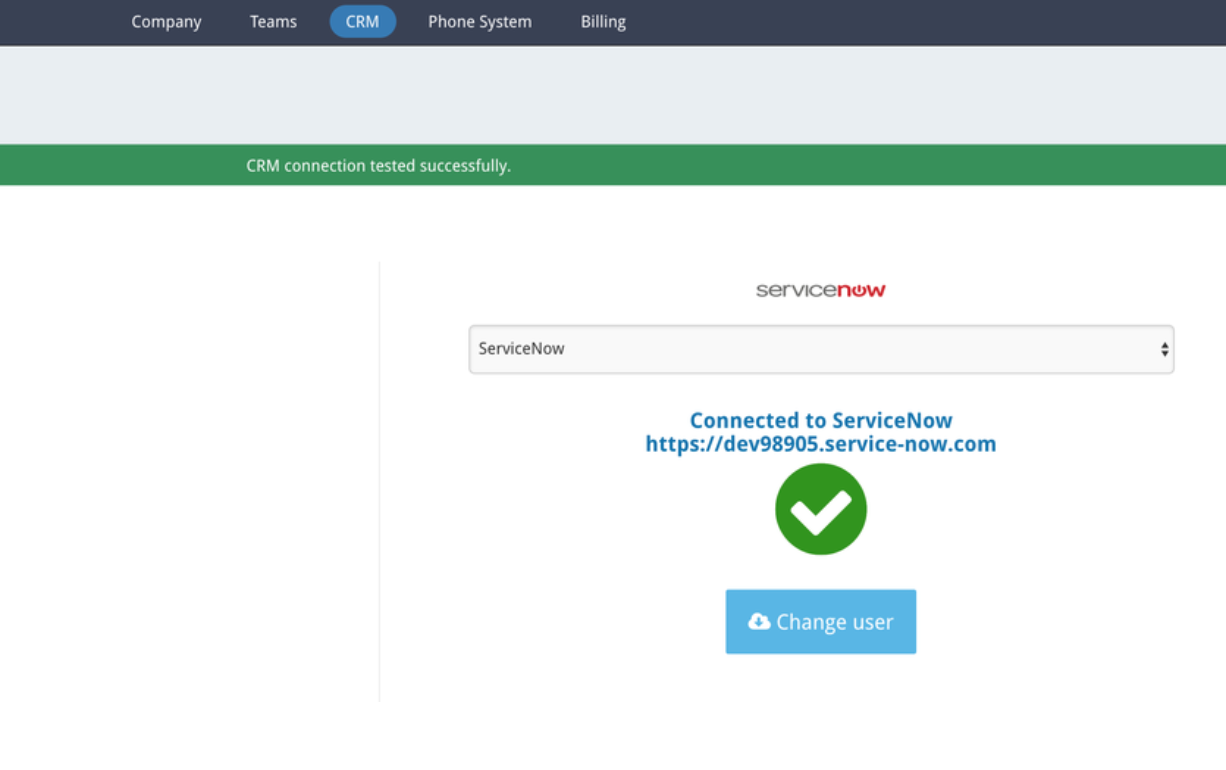
Navigate to Tenfold dashboard > Company Settings > CRM. This brings you to the following screen.
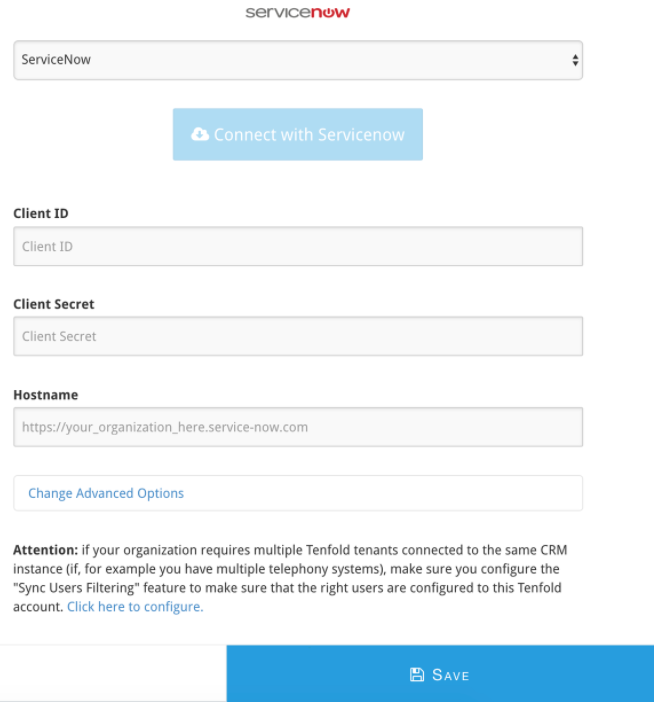
Fill the form with the Client ID, client secret captured 3. Additionally, provide the host name for your SN instance and click on Save.
After clicking on “Save”, click on Connect with ServiceNow. This will take you to SN to allow the OAuth client.
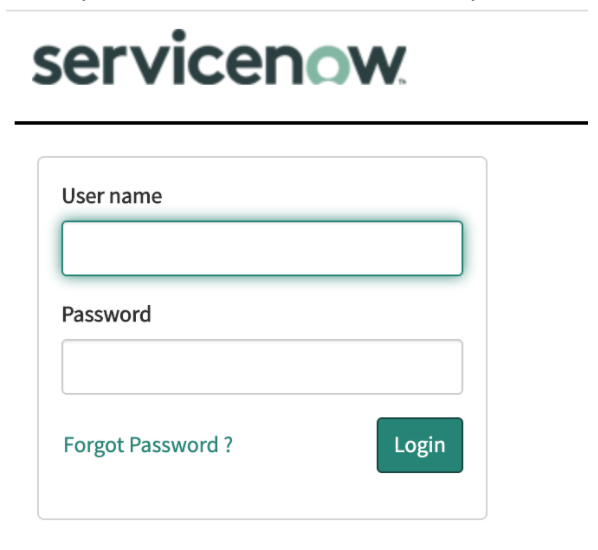
If you’re not authenticated to SN, you will be asked to log in.
On the next screen which displays click Allow.
You will be taken back to Tenfold dashboard. The below success message will display if authentication succeeded
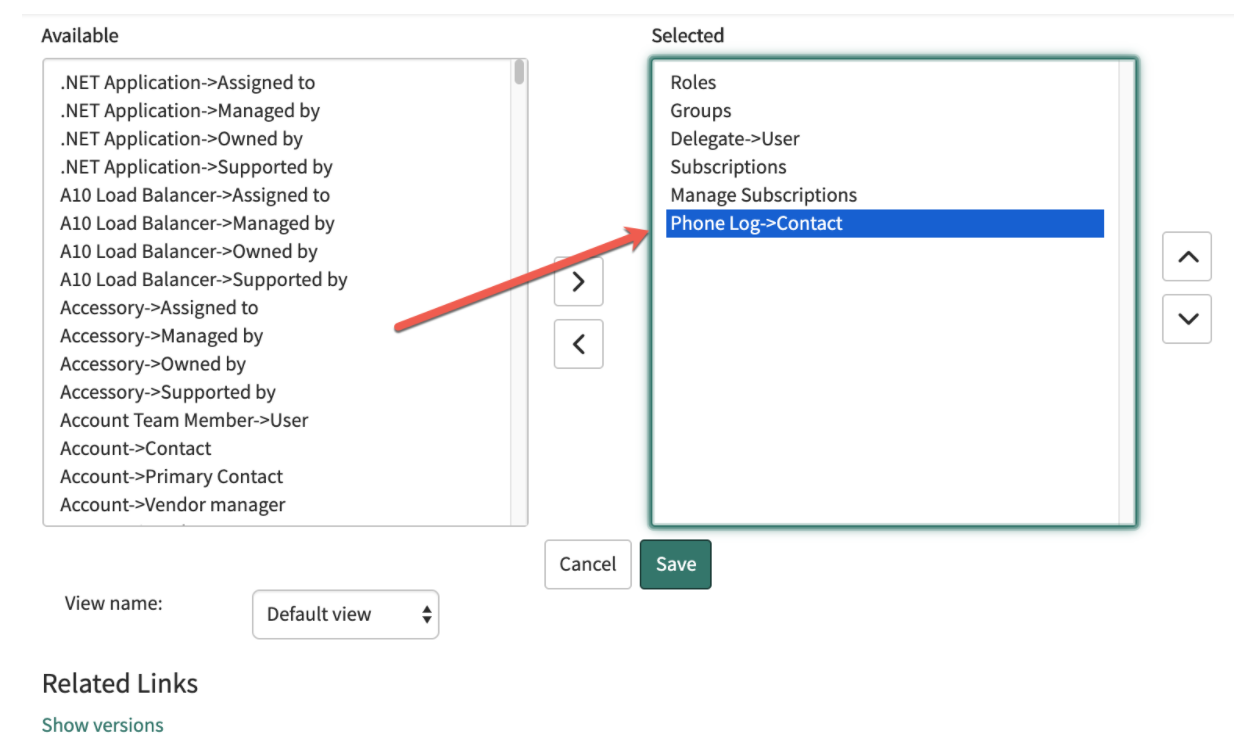
Enable the phone calls list for a user
By default, ServiceNow does not display the list of calls associated with a given record but can be configured to do so following this procedure:
Go to Users
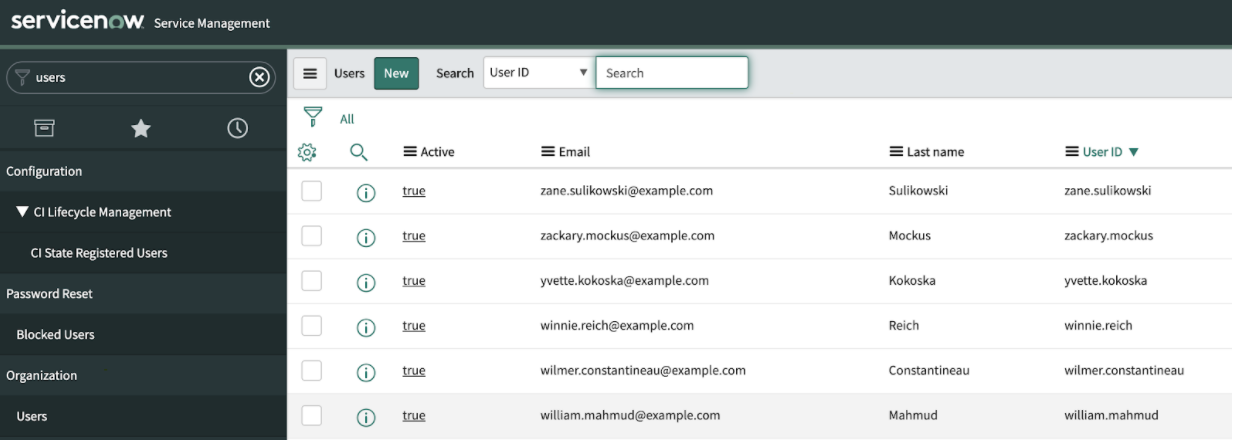
Click on one of the users to open the user details view and go to related lists
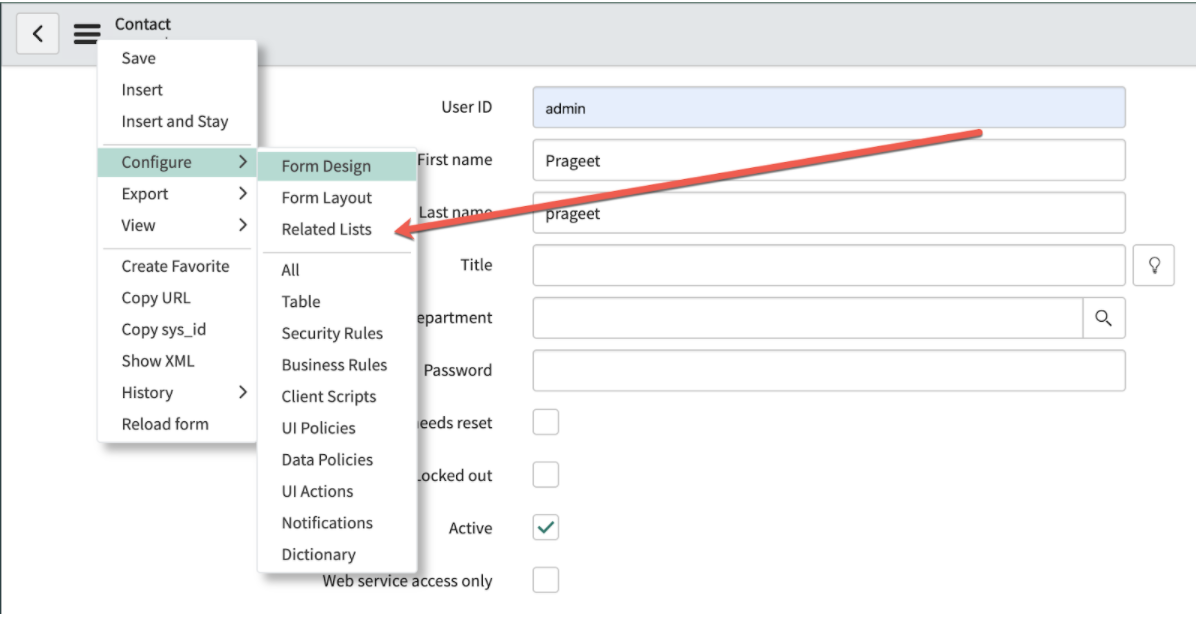
Find the Phonelog→Contact entry and add it to the selected list and click Save.